Friday, January 24, 2020

Tax Time is Tire Time

Take Advantage of Tax Time!


For many people, tax time is the time to do big things. Sometimes this involves buying a new toy - who doesn't want a fishing boat or a new guitar? But just as often it is the perfect time to do critical maintenance on your car or your house.

Tires and brake jobs are in the top three Maintenance Items on Your Car


An oil change is the other one, coming in at number one - and thankfully much less expensive than tires, or brakes. A standard brake job is around $65 per axle for disk brakes, plus parts of course; but, if rotors need to be replaced, the job can quickly get into the $200-$300 range, or higher.

And tires are more expensive - a set of small good bargain tires will still run over $300; larger performance tires, or all terrain or mud tires can easily go for $300 or more per tire.

Scheduling these more expensive maintenance items during tax time is a great way to deal with them, even if a trip might sound better - after all, if your tires wear out halfway through the trip, where will you be?

On the side of the road, that's where.


Look Before You Buy - The Best Deal Isn't Always The Cheapest Option

Whether you are spending tax money, paying for them out of pocket or financing your tires, check around! Consider how long the company has been in business, and ask about roadside hazard coverage - and ask exactly what it covers. Some stores offer this service, but the coverage is so limited it almost makes it meaningless. Make sure you know how often the tires need to be rotated; if you have a treadwear warranty, you will need to rotate the tires within the manufacturers specifications or the warranty will be voided.

Aside from that, regularly rotating your tires greatly extends the life of the tire. Depending on how many miles you drive, a set of tires could easily last you 5 years or more IF you take care of them - the standard set by most tire companies is 3,000 miles.


Big Tires can mean Big Savings

The other great thing about tax time is that you will find really good deals on the more expensive tires, as well as some excellent financing opportunities. If you have a high performance car, or a desire for a new set of wheels and mud tires, this is the right time of year to buy! Not only are there good deals at the dealer, but many manufacturers also offer rebates this time of year - just ask your local tire store about any rebates; these are most often paid via a prepaid VISA card that is sent to you in the mail, but on some tire and wheel packages these manufacturer rebates can amount to a very nice discount.


This blog post was written by the professionals at Maiden Tire and Wheel in Maiden NC We specialize in high performance auto and All Terrain and Mud Tires and have some great Tax Time Tire deals - for great deals and financing on tires in Maiden, call now!

Friday, March 22, 2019

Waycaster Tire & Auto is now Waycaster Service Center - same great deals and a New Location!

Waycaster Tire has been serving Lincolnton and Lincoln county in new and used tires for 20 years, and they still are - Waycaster Tire & Auto is now Waycaster Service Center, located at:

619 N Aspen St
Lincolnton NC 28092

704-748-9500


Waycaster Service Center is dedicated to bringing you the best prices on new tires in Lincolnton and the Lincoln County area - they have access to some great brands that have a much lower cost than the big name brands, but Waycaster Service Center can order nearly any size or brand of tire.

Used Tires In Lincolnton NC


And of course we have one of the largest selections of used tires in Lincolnton and the surrounding area!  have matched sets and singles starting as low as $140 per set or $35 per tire.

Call 704-748-9500 now for quotes on the new tires in Lincolnton that you need! Check out the latest tax season deals on new and used tires in Lincolnton as well!

Call 704-748-9500 for a quote on new or used tires today!

Saturday, December 2, 2017

NC Winters - Wet Roads and Traveling!

NC Winters are not like then winters up north - thank goodness! - but they do bring some challenges, notably a lot of rain and travel during the holiday season! 

Have you checked your titres lately to see how much tread you have left? Good tires are essential for safety on wet roads, and it does snow occasionally down here. Money can be tight, but this is not the time of year to ignore your tires until you have a flat!


Check Your Tires from Edge to Edge


Look at each tire from the inside edge to the outside edge; check to make sure the shoulders still have plenty of depth in them and that the tread is deep all the way across. All modern tires will have small wear bars in between the treads - when the tread gets down to these wear bars it is time to think about getting new tires.

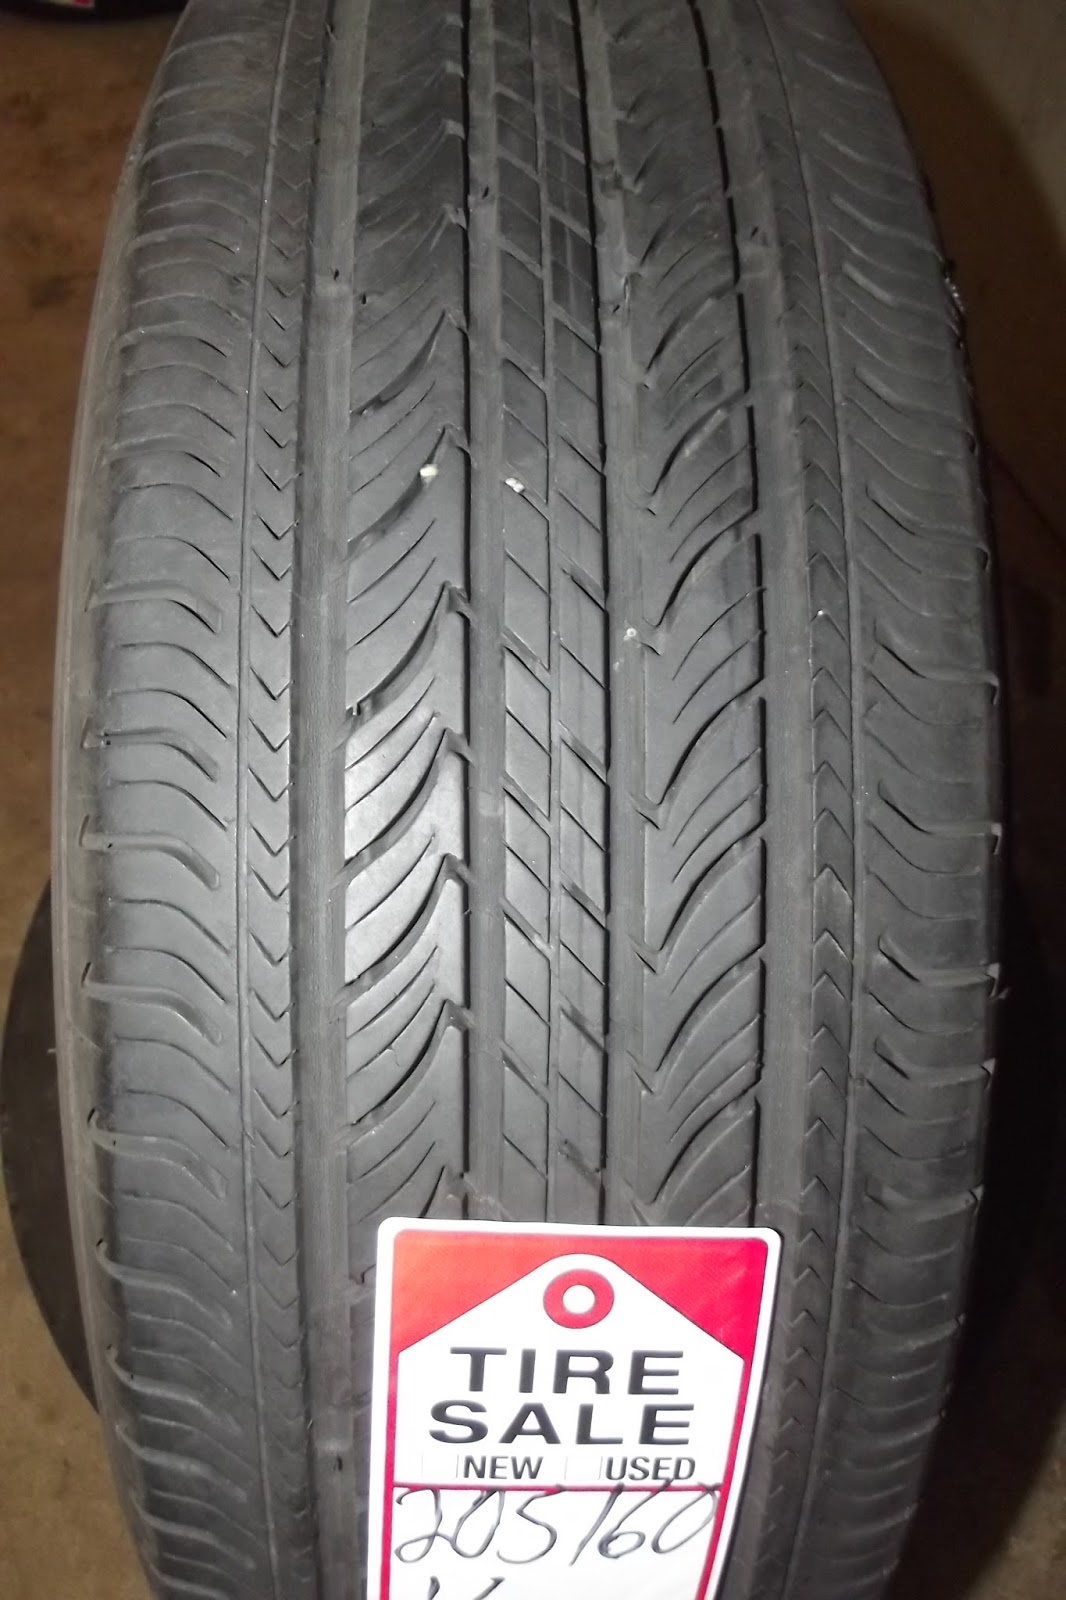
As you can see this tire has very even wear across the surface, but it is getting very close to the wear bars.


This tire is worn down on the shoulder; this usually happens because the vehicle is out of alignment or the tires were never rotated.


This is the other side of the tire pictured above - you can see it still ha decent tread left.


If your tire is showing signs of wear on the edge like the one above it is time to replace it; tires can also wear out in the middle of the tread; this is usually because the tires were over inflated.

You can get excellent quality used tires, but any used tire is going to have a higher chance of failure than a new tire, but sometimes used tires are all that are affordable, and most used tires will give excellent service. The one pictured below is a perfect example of a good used tire that will last for many many more miles.


Whether new or used, if you see your tires getting slick or wearing down at the edges this is a great time of year to think about changing them out - balding tires are bad in the rain and even worse in the snow, and the last thing you need as you are driving to your holiday destinations is a flat tire!


For the used tires Lincoln County NC drivers need, and for the best deals on used and new tires in Lincolnton go to Waycaster Tire & Auto on 902 E Main St!


Tuesday, October 3, 2017

Trouble Free Drum Mixes

Drums - Miking and Mixing


Drums can be one of the most aggravating things when you are mixing a full band, but many times people make the entire drum miking and mixing process much more complicated than it has to be. There are several different methods of miking drums, and each has it's advantages and disadvantages.


Close Miking


Close miking the drums involves putting a condenser or dynamic mic next to each piece of the drum kit, with additional mics close to the cymbals. This gives much more control over the individual components of the drum kit, but demands much more time in the mixdown process. For certain situations the additional control over the individual drums, especially when it comes to adding reverb and other effects.

There are many companies that offer mic kits for this, and these are usually a mix of dynamic and condenser mics.


'Jazz' Miking


Jazz miking or room miking the drums generally involves 3 studio microphones, usually large diaphragm studio mics, although some other mics can successfully be used (such as the AKG C1000). With this set-up, one mic goes in front of the kick (typically 12 - 16" away from the hole in the front kick drum head) and 2 overhead mics, usually placed 2 - 2.5 feet above the cymbals. Experiment with the placement of these overheads for the best result.

Reverb can still be added to the overhead for ambiance, but the main advantage to this type of mic set-up is the fact that it is very easy to get a very good, organic drum mix as the overheads pick up everything - the snare, the cymbals, and toms. And the stereo field is still good, just pan each over-head mic to the left and right.


For kits with lots of drums the overhead system generally works best, but of course there are many times when you will use some combination of the two, such as a standard 'jazz' miking technique with an additional snare mike for extra control over the snare.


 Which mics to use? 


I am a big fan of buying the best mic you can comfortably afford - but all recording engineers, especially those just beginning, need to realize that most people listening to your final mix won't have any idea what microphone you used to record anything. 

Don't let the perfect get in the way of the possible - there are a lot of amazingly capable mics right now for relatively small purchase prices, like the Apex 415 Large Diaphragm studio mic pictured above (available at James House of Deals for just $149.00 bucks!) that do an excellent job; there are even some in the less than $100 range that work quite well as overheads, such as the Audio Technica 2020 and the Apex 435B.


Once you have the song on 'tape', I like to start with the kick drum as the basic starting point on any song. Put compression and EQ on it, but just get it the general 'shape' that you want it to be - don't spend a lot of time working to get the perfect kick sound.

This goes for the other drums too, and we will talk about why in a few minutes!

After you get the kick sounding good, this will help set the volume for the rest of the song. Bring up the other drums after applying compression, but don't even bother EQing these drums yet. Once you have spent literally just a few minutes getting the drums up, bring up the bass guitar - it should be mixed about equal with the kick drum as far as volume levels go, sometimes a bit louder. 

Then bring up the rhythm and melody instruments.

Now, the reason you don't want to spend a lot of time getting that elusive 'perfect' drum sound is simple - you can't. I have seen engineers banging their heads against the walls getting the perfect drum sound by spending 15 - 20 minutes on each mic on the kit, and this can take up a lot of time if you are miking each individual component. Even with the room miking technique, doing this can take an hour!

The problem is, as soon as you start bringing other instruments and especially the bass guitar into the mix, it will throw off what you have done with the drums. 

In mixing a song down, everything affects everything else; this is simply the way frequencies work once everything is up and running. Instead of thinking of the drums as a single unit, always consider them as part of the whole. If the kick drum is obscured, instead of turning that drum up more take some of the bottom end out of the bass guitar (between 50 - 125 Hz is a good place to start). If the bass isn't punching through loudly enough over the kick, try enhancing the mid frequencies of the bass guitar to make it stand out more in the mix without in turn obscuring the kick drum.

Only after you have a good overall mix started should you begin listening to the drum mix and; you might need to add a bit of high end or mid-range to the snare to make it pop more, or roll off mid's or lows on the overheads so the toms don't interfere with the bottom frequencies of the kick and bass guitar.


Reverb and Drums


This is another area that you need to approach with caution - don't add a lot of reverb before you get a good mix on the song as a whole. Generally, the faster and busier a song is, the less reverb you will want to use. Keep in mind, you should always 'solo' the channel that you're working on,l and switch back and forth between soloing the channel and letting he whole mix play so you can here what you are changing in relation to the song as a whole. 

Slow songs have a lot more room for reverb, but many engineers have a tendency to turn the reverb up too much - use it sparingly, it should barely be noticeable in your mix!


Follow these simple rules, and keep in mind that quite often with drums, less is better - adjust the drums to the needs of the song, striving for a good, clean, clear mix where you can hear everything.

This song is one I used the Jazz Mic method on, and spent only about 25 minutes mixing the whole song. Have fun, and always remember you are mixing for the song - this will help to keep you from spending hours getting the 'perfect drum sound' only to realize that as soon as you start adding the bass guitar and other instruments you have to undo a lot of what you did.

For recording gear in Lincolnton and musical gear James House of Deals is open 6 days a week - come down to see all that we carry!


Monday, November 21, 2016

MixDown and Mastering - Understanding Studio Monitors and Why You Shouldn't Use Headphones Or Home Stereos

The Skinny on Studio Monitors


Recording music is easier than ever these days (but still not so easy it rivals falling off a log) but the mixdown and mastering still hold a special place in the minds of many home recording engineers - mainly, that they can't do it.

I would never take anything away from a good mastering or recording engineer - they can do things which I still don't understand.

But that is not the be all and end all of making your stereo master tracks and then Mastering them; everyone has an ear, and mixing multiple tracks into a listenable song is a skill like any other. When you start out the results might not be so pretty, but stay at it.


Understanding the Difference

Understanding the difference between mixing your stereo master tracks and Mastering is crucial, but it is something that a lot of aspiring recordists don't fully understand.

For a moment we are going to assume that all the tracks are synced up in time, that there are not any phase issues and everyone has recorded their parts in the right key.

Recording the Stereo Master tracks are where the greatest part of your sound, good or bad, is going to come from. This is where you actually mix all your individual tracks (or stems) into a stereo master track.

Peresonus Studio One has some great mastering tools which make the process much easier!


Mastering, on the other hand, is when you apply a final stage of EQ and compression to the stereo master tracks which you have created during the mixdown process.

This final stage does a couple of things - it ensures that all tracks you are doing have a similar volume setting, and it applies a bit of final compression and EQ to your mix.

Mastering your stereo mix down tracks should not be thought of as a way to 'fix' a poorly mixed stereo track. The stereo track should sound excellent before the final mastering takes place.


WHAT YOU ARE LISTENING THROUGH


This can make a lot of difference. Actual studio monitors are the best thing to use when mixing as most studio monitors add very little shaping to the mixed music. 


It is possible to use home stereos in a pinch, but the problem with home stereos or good consumer headphones is that they shape the music, accentuating the bass and high frequencies and often scooping a bit of the mid frequencies out.

When using such systems to mixdown your tracks, though, this makes it very hard to accurately tell exactly how your music sounds on a base-line level; this results in a mix which might sound very good on a particular system or set of headphones, but when played through other systems you realize the bass is way to heavy or almost non-existent, or some of the instruments or voices are buried in the mix.


Use Different Sized Monitors


I always liked to run at least two different sized monitors; one fairly small set (Like the Presonus Eris 4.5's) and one set with a bigger speaker or a subwoofer.

The Presonus Eris 4.5 monitors are a great deal, just $199.99!

These Behringers are a 6" monitor, and have a good amount of bass response

Switching back and forth between the two different sized monitors will allow you to pinpoint any frequency problems, and it also helps to reduce the risk of tiring out your ears.

Keep in mind, you are trying to get a mix where the song shines - your goal with studio monitors is not to get the best sounding speaker you can afford, but it is to get a good, flat response so that you can actually hear what you are mixing.

An old trick, and one that works great, is to import a stereo track from a similar type of music into your project, and compare your mix to how the imported track sounds. This gives you a direct A/B comparison to music that you sounds great to you.


Reference, Reference, Reference


Once you have a good stereo mix completed, don't pat yourself on the back to quickly. First you will want to listen to it through a number of different systems. When I am mixing, I like listening to a track that we think is ready through at least three things - a small, cruddy boom box or little CD player, a  good quality home stereo, and a car stereo.

When your mix sounds good in all of these amplification sources, you can be assured that it will sound good in just about any listening environment.

Now, on to the next song!


Mastering - The Misunderstood Art


So, if you had eight songs in your project and they are now all mixed to perfection, now is the time for Mastering those tracks. Even if you are sending your mixdown tracks out to be mastered, you should still master your tracks yourself just to see what kind of results you can get.

Keep in mind, the whole point is to get your music in front of people - 
and being proud of it once it is!

Generally, in mastering a track there will be a bit of compression and some very light EQ involved - you SHOULD NOT have to make big adjustments here; if you find yourself doing that, consider remixing the song.

It does help to have a fresh set of ears at this stage of the process; the goal is to put a final polish on the songs, and to make sure all the songs in a project have a similar volume level, and that they have a volume level which is an average for released songs (you don't want your songs appreciably lower than other source material).

Sending your songs out for mastering can be worth the money, but never assume that the person you are using has the sole gateway to good sound. An engineers best piece of equipment is what is between their ears. That being said, a well mixed song that is properly mastered is going to have a bit more 'pop' than one which isn't, and the hardware and software tools and technology you have available can make this section of the process much easier.


For new and used recording equipment in Charlotte and the surrounding area, including Presonus, Apex, Audio Technica and more, come to James House of Deals, the newest music store in Lincoln County!


Wednesday, November 16, 2016

It's Wintertime - And Time For Some Car Maintenance!

Check these Items To Make Sure Your Car Is Ready For Winter

As winter is finally setting in, there are a few things that everyone should check on their cars. Even a milder winter like we have down here in the south can cause problems to rise to the top, and these problems may make your car quit running for a day or cause serious damage that it would take hundreds or thousands to fix!

The Battery

As temperatures goes down, an older or poorly maintained battery will really be put under pressure, and batteries love a cold snap to simply give up the ghost. If this happens in the morning, it can cause hours of inconvenience and make you miss appointments or work!

There are two types of batteries, maintenance free and standard. Standard batteries will gradually run short on fluid, and as they get low on water they will have  a harder and harder time holding  charge or delivering enough energy to turn the motor over. If your battery is 4 years or older, consider replacing it. If it is not maintenance free and it seems to be sluggish sometimes, check and add distilled water. If you are not sure how to do this, come by Waycaster Tire & Auto or by many auto parts stores and they will check it for you.

This is a maintenance free battery - on batteries where you do need to check the water levels, there will be two caps (usually rectangles) that will cover three cells each. There will be an indicator line where the fluid should be. When refilling the battery cells, be sure to use distilled water!


Check Your Radiator Fluid

If you are driving a used car or if your new car has over 60,000 miles on it, you will want to get the radiator fluid checked and if needed flush and refill your radiator. Auto parts stores can usually help you with this.


As radiator fluid ages, it loses its ability to resist the cold; this can also happen if your radiator has a slow leak and you kept refilling it with water instead of anti-freeze. While we do not have many very cold nights in North Carolina and South Carolina, a heavy freeze can destroy a radiator or an engine if the anti-freeze in your system is not up to snuff.

Top Up With Freeze Prof Windshield Wiper Fluid

This one may seem a bit lightweight compared to the other things we are talking about, but freezing liquids in your car are never good, even if it just keeps you from washing the windshields, and one thing every winter is good at, even a light one like ours, is making our windshields dirty and hard to see through. This can be a safety issue, so get a good freeze-proof windshield washer fluid (I really like the Rain-X Winter formula) and top your washer reservoir up for a worry free, clean windshield experience!


A Great Time To Buy New Tires

Going into the winter is a great time to think about the new tires Lincoln County drivers need. It rains more often than it snows in this area, but winter is a time of bad roads; rain, freezing rain, snow and slush (and good ole North Carolina Winter Mud!) can all be treacherous, and this is made more so by running tires which are getting thin on treads. Waycaster Tires can now supply the new tires Lincolnton and Lincoln County drivers need to make sure their vehicle is as safe as possible. For NC Vehicle Inspections in Lincoln County, oil changes, rotations and of course a wide selection of new and used tires come to Waycaster Tire & Auto!

Waycaster Tire & Auto has New Tire Sets starting as low as $240.00, so call today to see what we can do for you!


New Tire & Wheel Deals At Waycaster Tire & Auto!

Wheel & Tire Specials!

Waycaster Tire & Auto has some great deals on new wheel & tire combos, like the Vision Off Road Warrior 375's pictured here! These wheels can be ordered to fit a variety of pick-ups and SUV's!


For just $999.00 PLUS tax, you get 4 x 18" wheels like the one pictured above, new tires, center caps and mounting kit. We install everything - these are gloss black wheels with a machined aluminum face and are really nice looking wheels - you can see how well they dress up this Ford Explorer.

Other sizes are also available, and we can source different tires such as All Terrain tires or specific brands, though this will affect the price!

Call now to make sure we can get these to fit your vehicle - tires and wheels are special ordered to assure the proper fitting! These wheels come in a number of configurations that fit many pickups and SUVS or crossovers and are also available in 16" wheels.

For new tires in Lincolnton and NC Inspections in Lincoln County come to Waycaster Tire & Auto, and we will get you rolling right! We offer oil changes, NC Vehicle Inspections and more here at Waycaster tire & Auto!


Saturday, November 5, 2016

Building Tone - Getting The Guitar Sound That is Right For You

Acoustic Vs. Electric - Tone Considerations

Acoustic Guitars, when it comes to tone, are much more organically arrived at, and it all starts with the sound of the guitar itself, and then playing that guitar through the cleanest PA or amplifier system you can afford - no great mysteries there.

But electric guitars are different; there are too many factors involved in getting a great tone from an electric guitar, and they can be endlessly tweaked and added to. This can be aggravating, but it can also be rewarding, when you have sifted through a myriad of factors and finally achieved the perfect tone for you.

Knowing Your Tone

The first part of getting your perfect tone is having some idea of what that tone is, and this is where the type of guitar you will want to get really comes into play. If you want wide open, airy sounding chords and clean tones it is hard to beat a single coil or strat/tele style guitar. Single coil pickups excel at this type of sound. 


This Washburn Sonamaster is an excellent example of a Strat style single coil guitar!


However, if you want your clean sounds a bit darker and denser, Les Pauls or hollow-body guitars do really well, and they are great when it comes time to pour some distortion on mix!


My personal favorite pickup configuration is a combination of the two; a strat style guitar with a Double Humbucker in the bridge position. This allows me to get the clean, airy sound that I want for chords, and the dirty growl that humbuckers excel at!


A perfect mix of single coil clean clarity and the fat distortion tones possible with a
double humbucker make the double single single configuration of this guitar my favorite!


After The Guitar

Once you have chosen the guitar you want there will be two different things that will allow you to zero in on the exact tone that will make you happy. 

Remember, when it comes to tone, there is no right or wrong answer. Study other people's sounds to see how they do it, but keep in mind that your tone is your own. Try weird things, and don't be afraid to ignore the advice of others - don't be afraid to take it either, sometimes it can save you a lot of time on your journey!

The Amp


The second leg of your tone will be your guitar amp. I personally look for an amp that has a certain clean sound that I am looking for; I can get the distortion I want through a variety of different means.

But some people want a particular amp just because it has a certain sound in the distortion mode. Mesa Bogies spring to mind for this, as well as Marshalls and Orange - note that amps chosen for this reason are usually tube amps. For this reason, this can also be one of the more expensive parts of your tone chain! 

Take your time, and play a lot of different amps, then choose the best one you can afford.


Traynors have a very distinct distortion sound but also possess crystal clear clean tones!

Fenders are workhorses, and while I do not like most of the distortion sounds on Fender Amps
the clean sound is worth it!

A Matter Of Effects

Effects, whether they come in individual effect pedals or in a multi-effect unit are the last leg of your tone, but they can be just as important as the amp and the guitar.

As with everything, getting the really good stuff costs money but keep your mind open when it comes to effects. Some cheap effect pedals are wonderful, but when it comes to music gear including effects you generally get what you pay for.

Multi-Effects and Stomp Boxes

For most of my playing career I have used multi-effect units, like the Boss GT Series or what I am currently using, a Vox Tonelab unit.


You can get some great tones out of multi-effects units, and I love them for their versatility and the fact that one button push can trigger a whole new sound set. The built in expression pedal is great too, for adjusting modulation speeds, acting as a volume or wah pedal, or adjusting many other parameters.

The down side to multi effects units is that they can be a pain in the butt to program, and if you do not have a lot of time they can be very aggravating to work with. There are some amps too that just do not like being hooked up to these units. Usually, the better the clean sound on an amp is, the better it will sound with a multi-effects unit.

Single stomp box effects, on the other hand, generally sound good through just about any amp, and it is very hard to beat the quality levels of individual stomp boxes. 

They are also much easier to adjust to get just the sound you want, but there is some degree of experimentation that you will want to do.

The Robert Keeley pedals are very hard to beat, and while they are a bit more expensive than the average Boss or DOD pedal they are a boutique pedal made in the USA, and they have unrivaled tone and adaptability!

The Vibe-O-Verb is one of my favorites, and is just $149!


Changing the order of the stompboxes can make a big difference in how the sound gets to the amp, so when you are playing with individual effects get deep into the pedal and make big adjustments to see what the pedal can really do. 

Once you are happy with that, try changing the order that the pedals are plugged into each other, and see how much of a difference putting your distortion or reverb in front of or in back of the other pedals. 

The other cool thing about using effect pedals is that it is fun to search for new little gems to fill out your sound - in fact, I am toying with the idea of re-doing my guitar rig one more time, I have found myself inspired by some of the effect pedals I have been trying out to write this piece!

To try out the Robert Keeley pedals, come to the newest music store in Lincolnton James House of Deals!We have got a wide range of guitar effects in Lincolnton and also carry many new and used instruments, strings, accessories and more!


Tuesday, November 1, 2016

Save Money And Gain Flexibility With your TV Viewing!

TV Your Way - 2nd Tier Providers Offer Savings And Convenience


So called 2nd Tier Providers have been around for almost a decade now (in some cases, anyway), but they now offer more choices than ever - and a way to escape the cable company's price structure, depending on exactly what you want to watch.

Of course, to some people cable is essential. This is especially true if you are a sports fan as there is no realistic way to stream games and matches from many sports, although this is slowly changing - soccer (or football as it is known overseas) is a great example of that.

But, if you are not a sports fan it is possible to save money by combining one or more of the so called 2nd Tier. This includes Netflix, Hulu, Amazon Prime and some per pay providers like Vudu.


It is true that you can't get everything doing this, but for just over $25.00 a month I have Amazon, Netflix and Hulu, and this covers a lot of bases, providing a large selection of content that is both brand new and (with Netflix) older shows and movies that I can binge watch!

And, for those shows that I have to have, I use Vudu to buy the seasons - the Walking Dead is one I no longer want to wait till it comes on Netflix, but most seasons can be purchased for between $20 - $27 bucks, which is not that much when comparing it to a $70/month TV bill.

And, since everything is streaming there is no need to set a DVR device - you watch it whenever you want to! It would be nice if they start streaming at the same time the episode airs, but there is almost always a 1 day delay. After you get used to it it does not in truth seem like a delay at all.

PS3's make an excellent media entertainment center, giving you the ability to stream, play games and  BluRays!


And, more and more devices enable these services. You do need an internet connection with decent speed, but most modern Blu Ray players, smart TV's, or just about any gaming system has the capability to hook up to any of these services, including a completely free service, YouTube, which is fantastic for concerts and documentaries (not so much for current or past TV shows).

So if you are looking fro a way to save money, consider cutting ties with your cable company as a TV provider, and go to one of your local pawn shops in Lincolnton NC to get good, low cost electronics liker TVs in Lincolnton, game systems, computers and more!

Saturday, October 22, 2016

Presonus StudioLive AR12 USB Walkthrough

The Presonus StudioLive AR 12USB Mixer - A Walkthrough

Ever since I had heard about the new Presonus StudioLive AR Hybrid boards, I have wanted to try one out. They are a true hybrid board, combining the necessary features for live sound but also acting as a multi input interface to your digital recording system.

The Presonus StudioLive AR 12USB Hybrid Board


The Hook Ups

One of the coolest things about this board are the number of different hook-up configurations, and the output to the computer. The Super Channel, for instance, combines inputs from RCA jacks, the included Memory Card slot or a USB input - but unlike most really good mixers this channel also includes Bluetooth capability for hook ups to a phone, tablet or computer. This makes streaming music during breaks (or for Karaoke) extremely easy. This channel also has the 2 monitor outputs so those signals can be routed through the stage monitors too (this is essential for Karaoke or for dubbing in additional vocal tracks to a completed instrument mix).

The USB output on the back of the board is a standard USB 2 hookup, and will connect to any modern computer so that you can use the board as a recording board. 


It will work with any modern DAW system, and is incredibly easy to install; of course, it works particularly well with Presonus Studio One, and I had it up and running within minutes of hooking it up to my Dell Windows 10 system.

The first two channels are also optimized for a direct plug in for basses and guitars, with a small switch that increases your input levels so that a direct box is not necessary. Most amplified acoustics will not need this feature as they throw a much stronger signal than a standard electric guitar or bass. 


The Channels

The channels on these boards are very well thought out. The AR 12USB has 8 actual mic inputs, the first four of which have sweepable mid EQ's. The last four channels have a very nice 3 band with god EQ points, and all of these channels have 48v Phantom power for running studio condenser mics. There are also 2 distinct monitor sends (with separate slider volume controls for each of the monitor master volumes) as well as a send to the internal effects engine.

The effects are applied after the signal is split off to go to the computer, so if you are recording a live performance you can add effects to your hearts content for the live show; the board will send the unaffected signal to the computer so you can add reverbs and delays that are different from those you used live (this is actually a very important feature. It also allows you to apply effects to a singers voice when they are recording without those effects going to tape).

Note the sweepable mids on the first 4 channels and the PFL button on each channel!

The board has 2 XLR outputs as well as separate Control Room 1/4" outputs (for sending to another speaker system). The Control Room outputs carry the same mix as the main LR master fader, but they have a separate volume control.


I performed a simply test, which I will go through in greater detail in another post. I hooked up an acoustic guitar (A Seagull Excursion Spruce CW QIT electric Acoustic) and used a standard dynamic mic. i listened to the mix live, and recorded it into Studio One at the same time. 

Note separate master volume for the monitor mixes and the effects mix!

The board performed fully as I expected for a Presonus product - it sounded great with very little tweaking, and when I listened back to the song the guitar and the vocals were pristine (well, my vocals suck, but it recorded my suckiness in a very pristine manner!).


These boards are a fantastic step forward for a good, tough mixing board, and their capability as a recording interface is tremendous, delivering crystal clear, better than CD quality sound to your computer's DAW! 

To check out these boards and many other Presonus and Live Sound and recording products, go to James House of Deals, one of the best music stores in Lincolnton and your home for recording gear and computer interfaces in Lincolnton!


Monday, October 3, 2016

Learning the Fretboard - A Primer On Scales, Arpeggios And Chords

THE IMPORTANCE OF LEARNING SCALES, APREGGIOS AND DIFFERENT CHORD FORMATIONS


Most casual guitarists and many guitarists that play in successful bands do not know music theory on the level that a classical instrumentalist does – with the ability to read staff and the inherent knowledge that reading music brings to the way chords and scales relate to each other.


A WORD ABOUT CHORDS


Over the years, I have broken down guitar chords into three categories for the purposes of speaking about them and relating scales, chord forms and arpeggios to them.

·         The Open Chords - these are the chords that most people start by learning, and are played near the nut using both fretted and open strings

·         Bar Chords, Upper Register – these are bar chords where the root note is located on the fifth string (such as the D at the 5th fret or the C at the 3rd fret)

·         Bar Chords, Lower Register – these are bar chords whose root note is located at the top string (such as the C on the 8th fret, the A on the 5th fret, etc.)

One of the purposes of this article is to get you to see beyond these easy shapes – most chords have three main positions on the neck of the guitar: the open position, the upper register bar chord and the lower register bar chord. B and F chords can only be made as bar chords or by playing tones out of the chords.

By mapping out the locations of the notes of the chord you are working on, as seen below, you can find new ways to play the entire chord or tones out of the chord for richer, fuller songs. This will allow you to give your guitar different sounds as well as a greater ability to create subharmonies, movements and single note runs into what might otherwise simply be 4 bars of a standard C chord.


THE IMPORTANCE OF PATTERNS


Most instruments are not pattern based, but interval based. The keyboard is the classic example of this – a C chord is made of three tones, the One (which is the root note, in this case C), the Three and the Five. The notes for the C chord are below:

One – C note (root)
Three – E note
Five – G note

A minor chord is made by flatting the Three (in this case the ‘E’ note moves to ‘E’ flat).

But on a guitar or other fretted instruments, chords are represented by patterns. If you look below you will see a C Bar chord at the third fret. If you take that chord shape and move it to different frets, it becomes a different chord. For instance, the same shape played at the 5th fret becomes a D chord.

C at 3rd Fret (an upper register chord, where the main root is on the fifth string)


D at 5th Fret – Note that it is the same shape as the C chord above!


(Blank circles on the D indicate root notes)

Now, we want to map out where all the notes are for this chord – in this case, laying out where the triads of the C major chord are will also map the fretboard to find the notes we want.

By looking at these patterns we can figure out different combinations of ways to play chords and chord tones – this may not seem like that big a deal, but finding new tonal combinations to apply to your music can supercharge your creativity, or turn a simple progression into a work of art by playing different inversions and selected notes out of the applicable arpeggio and scale patterns.

This gives you much more room inside the song to find the inherent melody of a progression, and to spice up the progression itself. A great example of this can be seen when we look at the C Triads on the neck of the guitar. A Triad is a three note combination that makes up the chords, but Triads can also be played out of more complex chords.

Here, we see the C Triads – these are also all the notes that make up the C major chord


From the diagram above, we can pick out the familiar patterns of the C chord in question (the Open Chord Shape on the far left at the nut of the fretboard, the 3rd fret shape and the 8th fret shape), but we can also see all the different notes of the C chord across the entire neck of the guitar – remember, after the 12th fret the neck simply repeats itself.


ARPEGGIOS AND CHORDS

Arpeggios are simply the notes of a chord played one at a time, the same as a scale. If you look at a book of guitar arpeggio patterns you will see that all of the patterns will fit within the diagram above. This diagram contains all the notes on the neck that are contained in the C chord, and will allow you to quickly find shapes on the neck that will expand your concept of playing a ‘simple’ C. Mapping out your fret board with these notes will allow you to play chord and tonal variations as well as different inversions (where the root note is not played first) and pick out your own single note arpeggio runs across the entire fretboard of your guitar.

With the power of patterns, once you learn these shapes by heart you will be able to repeat them in any key by moving the starting point of the pattern to a different fret. For instance, just as the D chord above is the same shape as the C chord, just on a different fret, the mapping of the D Chord (D Triads) will show the same patterns as the C Triads, just two frets further up the neck of the guitar.


Notice that you see the exact same shapes as the C Triads, just 2 frets higher – once you learn the Triad and arpeggio shapes for different types of chords, you will know them for all chords of the same type (in this instance, simple major chords), though it will take some practice to master the way you play them!

Practice by learning all the triad shapes possible for the chord you have picked out, and then start practicing those shapes as you practice the normal chord shapes. It won’t take long for you to memorize the triad and tonal shapes that are possible, and then you will be able to see how easily those shapes can be used for any key you desire. This will open up the way you think about chords!


CHORD SUBSTITUTIONS AND EXPANDING YOUR TRIADS

Making small changes in the chords you use, or using chords that can be substituted for the chords in the base melody can greatly expand the freedom you have in playing different combinations of tones and single note runs in your songs. Changing a Major chord to a Major 7th makes a huge expansion in these possibilities, or a Minor chord to a Minor 7th. The seventh adds a fourth tone to the chord, and gives you many more choices for chord alternatives and arpeggios. Check out the full fretboard diagram for the C Major 7th chord quads and you will begin to get an idea of how many more possibilities adding just one tone to a chord will give you!


Not all chord substitutions are so obvious as making a Major a Major 7th, or a Minor a Minor 7th though. Keep in mind that depending on the way the song is constructed, not all substitutions will have the sound you are looking for – experiment with substitutions, but don’t be afraid to abandon an idea that just isn’t working out tonally!

A less obvious chord substitution is a Major chord a third above a Minor 7th root chord. This will make a lot more sense once it is translated into patterns as seen on the diagram below. If you are playing an Am 7th on the 5th fret, a C major chord played on the 3rd fret (or anywhere, for that matter) can be substituted. Not only does this give you a power chord option for a Minor 7th sound, but it also means that you can play any of the C Triads mapped out above when your root chord is an Am 7.

This will allow you to switch between tones and inversions from both the Am7 chord and the C chord, giving you a huge amount of choices in how to play the song.

An easy way to find this pattern is to remember that wherever you play a lower register Minor 7 chord (root note on the (top) 6th string) it will go with the higher register major chord (root note on the 5th string) 2 frets lower. So the 5th fret Am7 goes with the 3rd fret C Major, the 7th fret Bm7 goes with the 5th fret D Major, etc.

Check out the diagram below to see how these chords fit together!


You can see the C Major chord outlined in blue, while the Am7 is outlined in red. When you look at the notes, you will see that the Am7 has just one note extra (the A) from the C Major, which is C – E – G, so the notes for Am7 are A – C – E – G. If you move the Minor 7th chord from the 5th to the 8th fret, it becomes a Cm7 and the companion chord (in blue) becomes the F Major chord with the root on the 5th string at the 6th fret.

All the patterns for triads, arpeggios and tonal combinations that you learn for the Am7 – C pairing will be exactly the same for the Cm7 – F pairing, just 3 frets higher on the neck of the guitar.

Find a good chord book that lists alternative or substitution chords to help you explore this powerful tool, and buy a blank guitar manuscript book to do your own mapping of the fretboard. This will help familiarize you with the fretboard, and is also an excellent memory aid (writing anything down as opposed to looking at pictures or videos triggers different neural pathways in the brain, reinforcing the memories of the material copied down). Oddly enough, according to studies using a keyboard for typing or working with a screen does not give the same benefit as making notes with pen and paper.


SCALES – THE BUILDING BLOCKS OF MELODY

Chords form the basic building block of a song, shaping the song’s rhythm and giving it different tonal characteristics – minor chords for slow sad songs, happy little major chords for fun, bouncy songs, or any combination you can think of. In the example below, it shows one pattern of a C Major scale – with all scales there are 5 -7 patterns you will need to learn. All these pattern are the same scale, but by learning all of the patterns you will know the scale across the entire fretboard of the guitar, and will be able to play the C Major scale (or the same type of scale in any key, for that matter) anywhere on the neck.

All melodies are made of scales one way, or a hybrid of scales that you might stumble across. Just like chords, the scales on a guitar are learned largely by patterns. Like arpeggios, scales are usually played one note at a time, though striking multiple notes can be a great thing!

Any time you hear any single note runs in a song, they are part of a scale or arpeggio.

And, just like chords, once you learn the blues scale or the major scale in one key you will know it in every key – just start the first pattern of the scale on a different fret and it will be in a different key! Once you know these patterns there are also some other tricks that will allow you to easily change the way the scale you are playing interacts with the chords of the rhythm section, giving you different sound palettes as you build your leads or single note runs in the melody structure.

For example, moving the scale pattern below to the 8th fret will change the scale from the C Ionian Major scale to the C Mixolydian (A mode of the Major scale). The easy way to keep track of where the scales can be used is to think about playing them over the two Bar chord shapes, the higher register C bar chord at the 3rd fret and the lower register C bar chord at the 8th fret. Anywhere you play a conventional C bar chord you can start the scale pattern, which will make it a different Mode of the Major scale, in this case Ionian and Mixolydian!


Both of these scales can also be played over Cm and Cm 7 chords as well, but don’t neglect learning the different types of minor scales – they offer wonderful melodic possibilities.

Once a guitarist knows the shape and patterns of all the modes of the major scale, the scale can be played in any key by simply moving the 1st position of the scale to a different starting fret on the guitar. Find a good scale book to learn all the patterns for the different types of scales. For rock and country music, the Pentatonic scale and the Major are two of the most important scales you can learn.

Just like the Major scale, a shortcut to finding where to play the pentatonic scale can be found by rooting the starting position to the standard chord positions – in this case, a C or Cm can be played at the 3rd fret and the 8th fret in bar form.

The pattern below is the Cm Pentatonic scale:


 Note that this pattern of the Cm Pentatonic scale sits right on top of the 8th fret, a prime position for the Cm chord. This pattern can be played on the 5th fret, which makes it a C Major Pentatonic scale, but I have also had good luck playing the scale at the 3rd fret whether the C chord is Major or Minor. As you learn the different scale patterns and how they relate to their root chords you will find that there are multiple ways to play the scale against the chord.

This may seem a little intimidating if you are not already getting into scales and arpeggios, but as you map the fretboard for chord and arpeggio locations, or learn the patterns above you will find yourself making fast progress. If you are already playing scales and arpeggios, looking at the patterns in this way can help you expand your abilities and understanding of the fretboard and come up with great new tonal combinations from simple chords and scales!

James House of Deals, one of the best music stores in Lincolnton offers great deals on instruments, PA Gear, recording equipment, accessories and much more! When you need accessories or guitars in Lincolnton come to James House of Deals!